
iRig Pads Editor Software Introduction
Just released a few days ago, the iRig Pads
The iRig Pads editor is as straightforward as the iRig Pads hardware device: it is almost self-explanatory, without extraneous bells and whistles, which is meant in the most positive way. In a music technology world where buying a new piece of hardware or software often means spending countless hours learning how it works, I’m gratified to test a new gadget that is as easy to understand and to use as the iRig Pads and the iRig Pads Editor software.

You might also be interested in our iRig Pads hardware review which we published just a few days ago.
Using the iRig Pads Editor
Once the iRig Pads
iRig Pads Editor Overview
The editor software features a clear, coherent interface structure which makes it simple to use. The main elements are:
1) The scene editing area. Here, the presets (IK Multimedia call them “scenes”) to be edited can be selected, imported, exported, copied, and reset. This area is a smart starting point to formulate general settings before moving on to editing the pads, knobs, and faders.

iRig Pads Editor Scene Editing Area
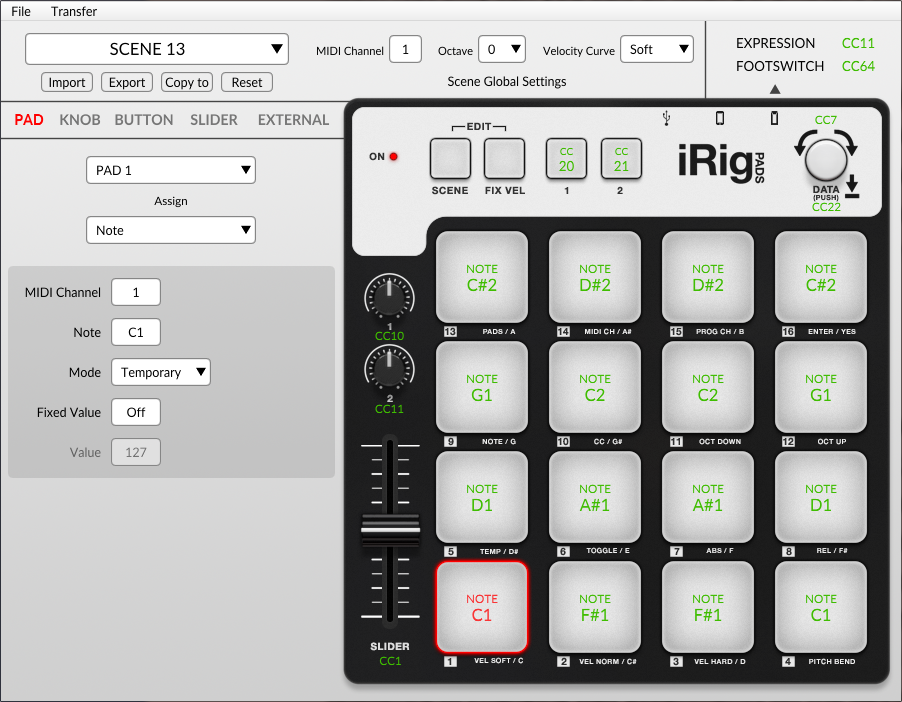
2) The control editing area. In this area, the user can define the general control types (pad, knob, button, slider, external) to be edited. In a second workflow step – the dark grey area – you can manage parameter changes for the general control types that were selected.
iRig Pads Editor Control Editing Area
3) The global settings area provides access to the three settings that affect all applicable elements within a scene. Those are (1) velocity sensitivity of the pads (featuring three different “curves”: hard, normal, and soft); (2) octave set of the pads; and, (3) the MIDI channel.

iRig Pads Editor Global Settings Area
4) The foot control area lets one change the parameter settings of any external footswitch or expression pedal connected.
iRig Pads Editor Foot Control Area
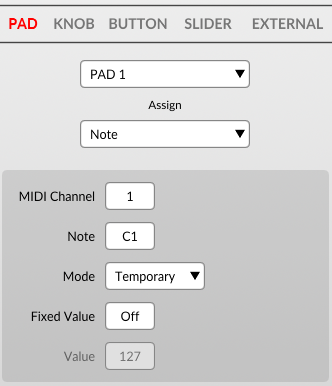
5) Finally, there is the controller surface area, which makes finding the right control element to be edited uncomplicated. Each control element labeled with a green note or CC number can be clicked, which causes the control editing area on the left side to automatically switch to the associated view. That way, it’s possible to edit all available parameters immediately.
iRig Pads Editor Controller Surface Area
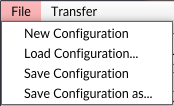
The File and Transfer Menus
Note, too, that the matter of file management has been resolved, and is as simple as can be. Here only standard menu items are listed: New, Load, Save, Save as…
iRig Pads Editor Transfer Menu
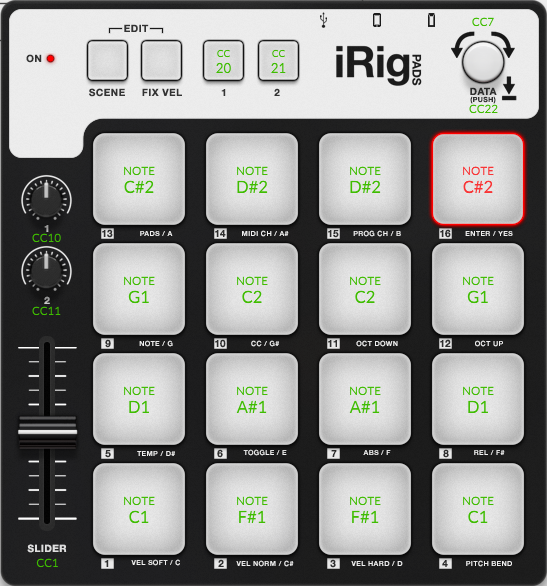
Likewise, the transfer menu offers four clear options, which permit users to receive and send configurations for the iRig Pads editor.
iRig Pads Editor File Menu
Conclusion
The iRig Pads controller left a good impression, and the positive experience with the iRig Pads editor only enhances that conclusion. The iRig Pads editor perfectly complements the clear and concise concept of the controller and was deliberately designed to make it easy to understand and use.
Due to these stellar test results, we have added the iRig Pads to our range of recommended pad controllers for finger drumming. That’s why we have prepared the XpressPads presets (scenes) for it and made those available as free downloads. Use the iRig Pads editor to load them onto your iRig Pads controller and get started with finger drumming right away.
P.S.
If you’d like to provide feedback on this iRig Pads
If you found this iRig Pads editor review helpful and consider purchasing the product, we’d appreciate it if you’d use the below Amazon link. It does not cost anything additional, but that action helps us keep up the work that we do in order to bring finger drumming to the people. Many thanks in advance!