Contents
Choosing The Best Drum Machines For Finger Drumming
Drum Machine Hit Detection Accuracy
Placement Of Knobs And Sliders On The Drum Machine Surface
Drum Machine Sizes And Weights
What Is The Best Drum Machine For Finger Drumming?
Choosing the best drum machines for finger drumming
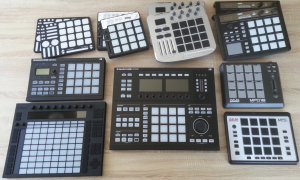
When beginning to learn finger drumming, it is essential to first choose the right hardware and software. When looking for a drum machine that best fits your needs and budget, a buyer should first consider some key elements. In this video, I provide a comprehensive overview of pad controllers and groove production studios
that are currently on the market, and I share my experience with each of these devices.
Drum machines covered in this video:
– Korg “PadKONTROL”
– IK Multimedia “iRig Pads”
– M-Audio “Trigger Finger” (Pro
& legacy version)
– Keith McMillen “QuNeo”
– AKAI “MPD” (18, 24
, 32
)
– Native Instruments „Maschine“ (Studio
& Mikro
)
– AKAI “MPC” (Element, Studio
& Renaissance
)
– Novation “Launchpad” (legacy version, Mini
& Pro
)
– Ableton “Push”
– Steinberg “CMC PD”
– AKAI “LPD 8”, Korg “NanoPad
”, ICON “iStage
”
Related: detailed drum machine reviews:
For a detailed review and even more in-depth consideration of pad controllers and groove production studios (which I’ll call “drum machines” going forward), please read on.
Pad Sensitivity
Pad sensitivity is one of the most fundamental topics in finger drumming. You MUST be able to play sounds effortlessly and you MUST likewise be able to accurately control hit velocity. If this fundamental precondition is not met, your finger drumming journey could quickly become a frustrating one.
There are a couple of drum machine manufacturers on the market. Although the 4 x 4 pads section looks similar on all the devices sold by these manufacturers, it can feel quite different when hitting the pads with your fingers, depending on the device you play. This is because manufacturers use different types of rubber materials for the pads and different hit velocity detection techniques and electronics. When comparing the cheap options to more expensive finger drumming machines, even from the same manufacturer, you might notice differences in pad quality and hit detection accuracy.
The pad sensitivity of your drum machine can be adjusted either directly via the hardware on the device or via the software through an editor. I prefer devices that offer both functionalities. Take some time to tweak the different pad sensitivity settings until you feel comfortable and relaxed when playing the pads, and note that finding that “sweet spot” can take some time.
Key take-aways:
– Pad sensitivity is crucial for finger drumming, especially for 1) playing sounds effortless and with little energy and 2) for accurate hit velocity control.
– Most devices offer options to change the pad sensitivity settings, via both hardware and software.
Drum Machine Hit Detection Accuracy
Linked to the pad sensitivity topic is the topic of hit detection accuracy; in fact, I would consider this equally important. Finger drumming is only fun if your setup works seamlessly and correctly ALL THE TIME – and this begins with the drum machine. Two things that I have found most unpleasant during my life as a finger drummer are:
(1) Occasional drop-outs. While you play and firmly hit your pads, you suddenly hear no sound at all from one specific pad. It can happen once in a while for that specific pad or a couple of times when hitting this pad successively. This is really annoying and seldom gets better over time. If you experience such an issue with a drum machine you recently purchased, it’s best to take it back and request a refund or replacement.
(2) Unintended triggering of a pad you did not hit. Also annoying, but usually not as bad as occasional drop-outs, is the unintended triggering of a pad that you actually didn’t hit. That can happen while you hit a different pad on a drum machine with a lot of energy. The device misinterprets this powerful hit as a simultaneous and usually less powerful hit on a different pad and produces a soft midi note for it. If you can use the pad sensitivity parameters to get rid of this problem by increasing the trigger velocity threshold a little bit and still feel happy overall, this drum machine might be fine to go ahead with. If you can’t remedy it entirely, then again, ask your dealer for a replacement.
(3) Significant jumps in velocity while playing steadily. This is an issue I have had with rather cheap drum machines (< US$ 100) that I have bought and tested in the past. It seems to be linked to the overall quality of the hit detection process chain and probably is one trade-off for the low price. Even after tweaking the pad sensitivity parameters to their limits, you may still experience these unintended “jumps” in velocity. I am not an engineer, but I believe it could be the cheaper electronics beneath the pads or improperly deflashed pad bottoms, or something else, but it’s likely to be common to very cheap drum machines.
Key take-aways
– Don’t buy the very cheapest drum machine you can find. – If you figure out hit detection accuracy issues like occasional drop-outs, unintended triggering of pads, and significant jumps in velocity while playing steadily and can’t fix them within a reasonable time, return that drum machine and choose a different one.
Placement of knobs and sliders on the drum machine surface
Why is it important where the knobs and sliders are placed on the surface of a pad controller or groove production studio? Well, when you play finger drumming with the XpressPads technique, there are two basic hand postures that you will alternate between all the time while playing. Those basic hand postures are crucial, as they enable you to play efficiently.
While experimenting with many different drum machines I found out that knobs and sliders that reach high above the device’s flat surface can get in the way of your hand motions while you play. This is particularly problematic with adjacent left and right sliders and knobs as well as those below the 4 x 4 pad section; the higher the knobs and sliders, the worse it can be. Sliders and knobs above the 4 x 4 pad section are no problem.
In addition, for ideal finger drumming there should be some unoccupied housing space about the width of an index finger next to the 4 x 4 pad section.
Key take-aways:
– Knobs and sliders mounted on the surface of your drum machine can make efficient finger drumming difficult, especially if placed left and right next to the 4 x 4 pad section.
– The higher the knobs and sliders, the worse.
– Some spare housing space next to the 4 x 4 pad section will benefit your playing.
Drum machine sizes and weights
If you have lots of space and a studio or home studio where you seldom shift equipment around it is likely that the size of your equipment doesn’t really matter. However, if your space is limited or you like to travel with your musical equipment at hand, you should pay attention to the different sizes and weights of pad controllers and groove production studios.
I personally am fond of high-performance, low-weight, small equipment. The smallest drum machines available today are as small as an iPad, and the largest are as big as a semi-pro, 12-channel desk mixer
—and they are pretty heavy.
Always read the tech spec sheets of the drum machine you intend to buy. Most are USB-powered, but there are still some available which require an external energy supply.
Key take-aways:
– If you travel a lot or have limited space, consider buying a small drum machine.
– If possible, buy a USB-powered drum machine for increased flexibility.
Your budget & Your needs
To become a finger drummer you don’t need a big budget. You can buy a good drum machine for about US$ 150. In addition, you need at least one virtual drum kit to get started.
You can get good virtual drum kits legally on the internet for little or even no money.
You might ask yourself: Why the heck are devices with a 4 x 4 pad section on the market that cost US$ 1,000? Well, the point is that with those groove production studios you not only buy the included 4 x 4 pad section but a lot of additional software and hardware features. BUT, YOU DON’T NEED THESE FOR FINGER DRUMMING!
If you want to become a finger drummer, a pad controller with a proper pad section is all you need. You really don’t need bells and whistles for finger drumming. You CAN use a groove production studio that costs two to seven times more than a good pad controller, but you can also invest your hard-earned money in some nice virtual drum kits or in a second pad controller, so you can start finger drumming with two pad controllers. That’s the ultimate finger drumming fun, and there is a huge part dedicated to this topic in the Xtreme section of the XpressPads Finger Drumming “Core Program” e-Course.
Clearly, I am not suggesting that you not buy a groove production studio. Groove production studios are great, and you might need all the features grove production studios offer, especially if you want to create beats and loop-based music in a specific way. The bottom line is this: Consider what you need for finger drumming and your other music production ideas before your make your purchase decision.
Key take-aways:
– You don’t need to invest a lot of money into your finger drumming hardware
– Don’t buy 4 x 4 pad controllers on the very low price end (<= US$ 100), or at least test them thoroughly for the above-mentioned issues if you’re really tight on budget.
– For finger drumming, it is perfectly fine to use a (more) expensive groove production studio, but that’s not required. To get started you just need a regular pad controller.
What is the best drum machine for finger drumming?
Before sharing my favorite drum machines, I have to admit that there are no groove production studios among them. Groove production studios are a different “class,” so to speak, and I haven’t been using groove production studios long enough yet to be able to give you an educated recommendation here.
In the past I haven’t used groove production studios because I simply didn’t need the additional features they offer for my music production workflow. I am a finger drummer. If I want to create a drum track, I pick a pad controller, link it to a virtual drum kit in my DAW, and record the drum track into my DAW. I am a guitar player as well. If I need a guitar track, I likewise pick a guitar, link it to an amp simulator plugin like Native Instruments Guitar Rig or IK Multimedia Amplitube
in my DAW and record the guitar track into my DAW. My DAW is the place where I start mixing tracks and play with audio material, even if the music I make is purely sample-based. I don’t need a groove production studio for this. However, if you have a different workflow that requires or includes a groove production studio, that’s fine! Don’t let anyone stop you from doing what works best for you!
That said which are the best pad controllers? Although I admit to some personal preference, I have been using more or less the same pad controllers over a couple of years. In separate reviews, I will go more deeply into each of them. And here they are in order of “flight hours” (, not ranking):
(1) “MPD218” from AKAI
(2) “PadKontrol” from Korg
(3) “QuNeo” from Keith McMillen
(4) „iRig Pads“ from IK Multimedia (the latest addition to my fleet)
(5) “Trigger Finger” (not the newer “Pro” version!) from M-Audio
I bought all four for less than US$ 200 each. I have two of each so I can play the XpressPads Xtreme techniques on them, which involves playing two pad controllers at the same time. This is where the real fun begins.
The groove production studios that I have tested for finger drumming so far and which worked fine for me as well include (note that order does NOT represent any ranking):
“Maschine Studio“ & „Maschine Mikro
” from Native Instruments
“MPC Studio” & „MPC Element
“ from AKAI
“Trigger Finger Pro” from M-Audio
Each is shipped with its own special groove production software that is controlled by the hardware. Their primary focus is loop-based groove-, beat-, and song-production. Currently, all these devices (except the “Maschine Studio”) can be bought for less than US$ 400 each.
Feel free to share your feedback and ideas on drum machines in the comments section below or directly in the comments area of the above video on YouTube.
P.S.
If you’d like to provide feedback on this article on drum machines and video tutorials, use the “comments” section below or use the video commenting functions on YouTube or Google+. We’re interested in your thoughts and your experience.
If you found this drum machines article helpful and consider purchasing a drum machine, we’d appreciate it if you’d use the below Amazon link. It does not cost anything additional, but that action helps us keep up the work that we do in order to bring finger drumming to the people. Many thanks in advance!


